Even though we have really littles, we joined the district in participating in Red Ribbon Week to show our support. The ECDC held a door decorating contest and we had a lot of fun finding ideas. Here are just a few of the doors, there were too many to post!
Pre-K 2
2's-"Our Class Leaves Drugs Alone!"
PPK (1st Place Winner!) You can't tell from the pictures, but the windows actually open up with pictures of her class dressed up like goblins and monsters. It was SO cute.
Pre-K 1 (2nd Place Winner) Those are the kids handprints, so cute!
We also dressed up all week for Red Ribbon Week, this day was "Give Drugs the Boot" and we all wore boots. The girls wanted their picture taken with their boots on, and as you can see the boys were clearly disinterested. SO funny, 4 & 5 year old boys have no tolerance for posing pictures, lol.
Since we won 2nd place, we recieved a $50.00 gift card towards a classroom purchase. Since the election was right around the corner, we talked about voting and decided to hold a Toy Vote. First, the kids found things under $50.00 in a catalog I put in the Library. Next, we held a vote and took the 3 most popular items to hold a final vote. The kids got really into it! They lobbied for their favorite and used very persuasive arguments to point out why their choice should win. We used the opportunity to discuss that everyone had the right to use one vote, we respected everyone's choice even if we disagreed, and after the voting process, we accepted the results with happy hearts. It was a huge success! A cash register with fake money and toy phone won by the way by a 2 vote margin. :)
For Halloween decor, Pre-K 1 made a word ring from Halloween words. They wrote the word and then added a ring.
I LOVE Pre-K handwriting.
We made spider little books.
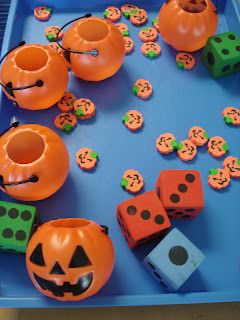
And added spooky spiders, jack o' lanterns and lima bean ghosts to the sensory table.
We continued to play games that teach us how to use a die and take turns. This was a witch's brew game where you add lizards, spiders, bones, bat wings, or worms to the pot until you don't have any left. It was pretty popular.
Pre-K 2 had a game, too with spiders and jack o' lanterns.
Love this morning message.
Pre-K 2 also did marble painting spider webs and added ring spiders!
Pre-K 1 made this cooperative witch for morning message. She looks pretty friendly!
Do you know the best Fall/Pumpkin story ever? It's this one:
If you ever buy a pumpkin book, make it this one! We added the words to the story in the pocket chart and the kids did it over and over by themselves!
We also built houses in block center to make them into Haunted Houses. Here's one in progress.
Each group built a huge house, then we printed them in black and white and added stickers for our book.
Each house turned out unique!
Each class had a pumpkin and did a pumpkin investigation. We did this chart in Pre-K 1 and a sweet mom pointed out that it was missing a "K", whoops! I fixed it, don't worry.
Our pumpkin had WAY more seeds than we would have thought. We took them out and placed them in cups by 10's.
The kids got to reach in and feel the inside of the pumpkin to describe how it felt.
Then we turned him into a happy Jack O' Lantern!
After drying the seeds we made mini jack o' lanterns with orange string and seeds inside!
Pre-K 2 sequenced the life cycle of a pumpkin after reading Pumpkin Cirle by George Levenson.
They drew pumpkin circles and then added seeds to the inside, too! Here is the birthday girl working on hers!
We also journaled about our pumpkins. I love this pumpkin patch with our big pumpkin in the center!
So sweet, friends helping eachother spell "pumpkin".
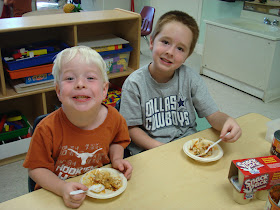
Ms. Amy had a snack craft for everyone to enjoy...pumpkin pies! These pies were really easy for the peas to put together. We crushed graham crackers for the crust, then added it to our bowls. Then we stirred together vanilla pudding and pumpkin pie mix (with the seasonings added.) We topped it with whipped cream. Yum!
One of our last pumpkin activities was making "Starlight Pumpkins" from this site. She has some amazing art lessons! We drew our pumpkins first, added lines, then used red and yellow paint to create orange. We also made green leaves using yellow and blue paint.
Afterwards, we cut them out and glued them to black paper. We made a chalk moon and stars and added our leaves and some vines. I LOVE these.
The kids really enjoyed all of our pumpkin activities and our busy and fun month continues!


No comments:
Post a Comment